-
Log in to Plesk.
-
Install extensions SSL It! and Let's Encrypt.
-
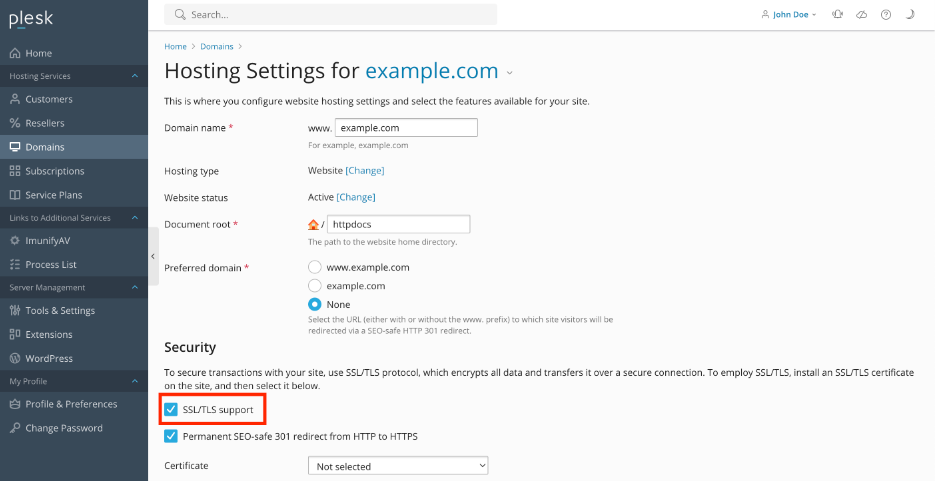
Go to Domains > example.com > Hosting & DNS > Hosting Settings (or Hosting).
-
Enable the option SSL/TLS support if it is disabled and click OK or Apply at the bottom of the page:
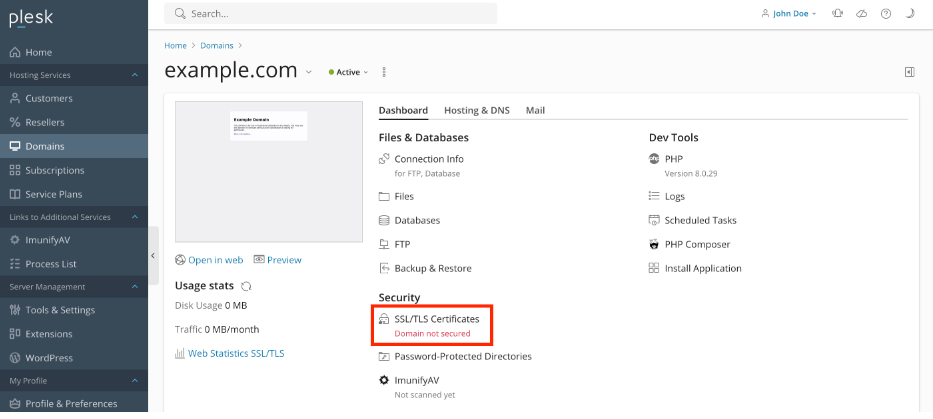
- Go to Domains > example.com and click SSL/TLS Certificates:
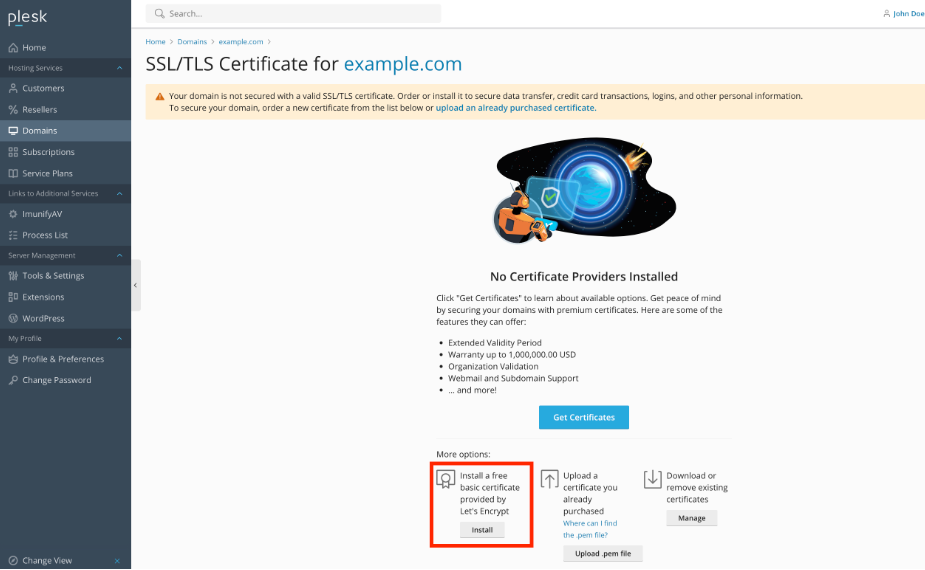
- At the bottom of the page, click Install in the section More options > Install a free basic certificate provided by Let's Encrypt:
-
Select the desired options for the certificate to be issued. We recommend enabling the following options:
-
Secure the domain name
-
Include a "www" subdomain for the domain and each selected alias
-
Secure webmail on this domain
-
Assign the certificate to mail domain
-
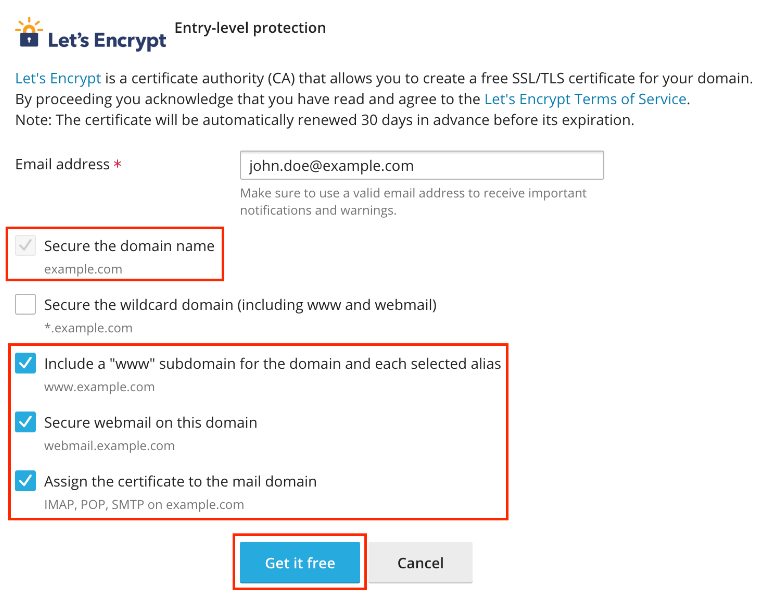
Note: The specified Email address will be used to receive important notifications and warnings about
the certificate sent by Let's Encrypt. Plesk by default takes the email from the owner of the domain to secure.
Click Get it free. At this stage, an SSL certificate from Let’s Encrypt is generated and automatically
assigned in Plesk to secure the domain. The certificate is valid for the next 90 days and will be auto renewed
by the SSL It! extension.
