Follow the steps discussed below to add a customer within your Reseller Plesk Panel:
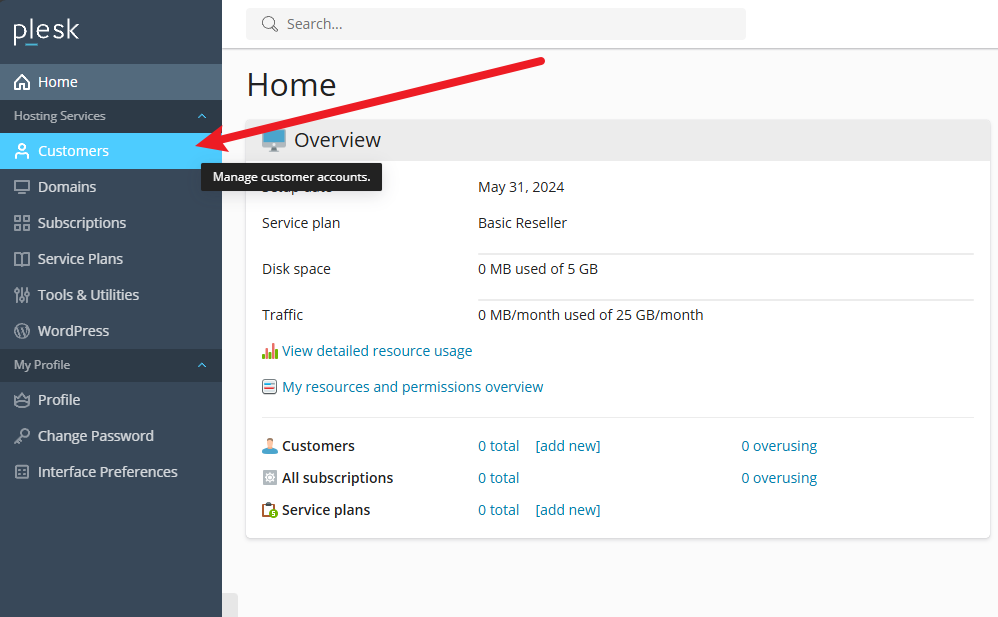
- Log in to your Plesk Panel.
- Click on the “Customers” option under “Hosting Services” on the page’s left sidebar.
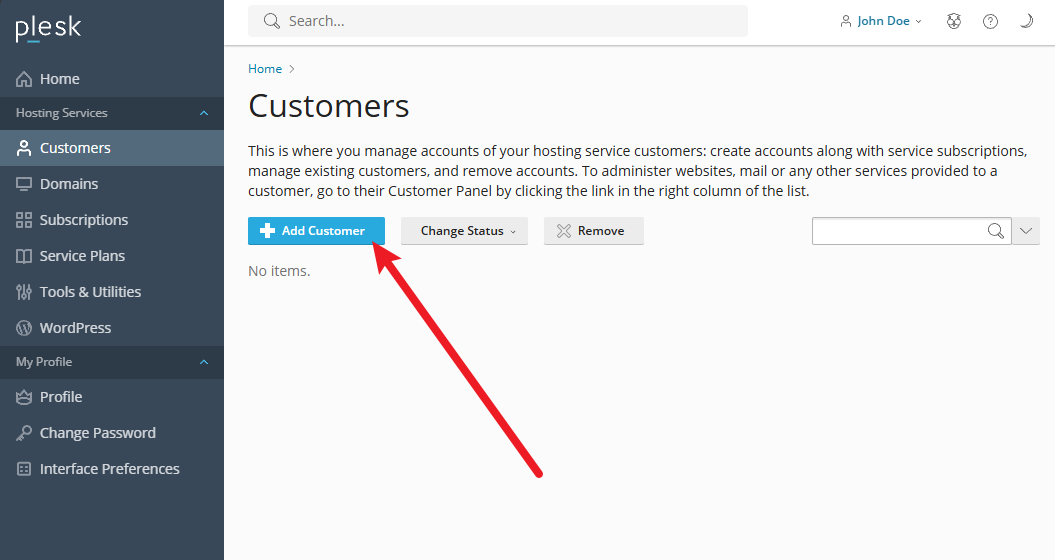
- Click on “Add a Customer” to add a new customer to your panel.
- Fill in the mandatory information required within the Contact Information section.

- Add a relevant description in the text box under the “Information for the administrator” field. Your customers won’t be able to see the information within this description.
- Under the “Access to Plesk” section, enter the correct Username and Password within the respective fields. Then, in the “Repeat password” field, reenter the same password entered in the Password field. Ensure that the entered password is strong and alphanumeric. Then, click on “Generate” if you want to use an auto-generated password instead. Otherwise, you can manually enter your own password.
- Your customer for whom you create an account will use these login credentials to access their particular Customer Panel.
- Select the “Activate account by email” checkbox if you wish to send an account activation link to your customer via email.
- The “Create a subscription for the customer” checkbox is checked by default under the “Subscription” section. In case you unselect this checkbox, your customer won’t be able to log in to their account or the Customer Panel.
- Enter your customer’s domain name in front of the “Domain name” field.
- Below the “Domain name” field, a default IP address will be shown.
- Now, enter the same Username and Password you had entered the “Access to Plesk” section. Then, in the “Confirm Password” field, reenter the same password. Again, ensure the password is strong and alphanumeric.
- From the dropdown menu, choose the suitable “Service plan”.
- Below, you will find a checkbox. If you select this checkbox, it will lock the subscription for syncing. Hence, it is recommended not to select this checkbox.
- Below this checkbox, you can add a relevant description in the text box provided. This description will only be visible to the Plesk Hosting Reseller or the Plesk administrator.
- Check the “Secure the domain with Let’s Encrypt “ checkbox under the “Secure with an SSL/TLS Certificate” section. This selection allows you to secure your domain with a Let’s Encrypt SSL Certificate. You ensure your domain points to the server. Once you successfully add your customer to Plesk, you can install Let’s Encrypt SSL.
- Finally, click on the “OK” button.
You have successfully added a customer to your Reseller Plesk Panel.
